How to make plantation shutters DIY
Pre-Installation Preparation:
Installing plantation shutters is a task that requires careful consideration and careful execution. Alright, let’s dive into what you gotta do before you start the installation. Just a heads up, it’ll take about 20 to 30 minutes, and if you’ve got big plantation shutters, it’s smart to have a buddy lend a hand, especially if they’re up high. Firstly make sure your window, floor, and hands are squeaky clean.
Components for DIY Plantation Shutters
In-order to start the plantation shutter installation process double check for the parts of shutters. If you are looking to buy custom plantation shutters or you might need help to install plantation shutters we are here to set your dream home. Back to the process, so the necessary parts of plantation shutters for DIY installation are as follow:
Shutter Frames:
These serve as the backbone of the entire assembly, providing structural support to the shutters. Assembled using Hoffman keys, these frames hold the shutter panels securely in place, contributing to the overall stability and functionality of the shutters.
Shutter Panels:
These panels constitute the body of the shutters, defining their appearance and functionality. Attached to the frames via hinges, they allow for smooth opening and closing motions, crucial for regulating light and maintaining privacy.
T-Posts (if applicable):
In certain installations requiring additional support, T-Posts are employed. These posts can be screwed onto the shutter frames, providing extra stability and reinforcement, especially in larger or heavier shutter configurations.
Light Blocks:
Essential for light control, these blocks are instrumental in preventing light infiltration through the gaps between the shutter panels and the window frame. It is important in three-sided frames, light blocks ensure optimal light regulation and privacy.
Magnet Catches:
Serving as the final touch in the assembly, magnet catches play a crucial role in ensuring the shutters remain securely closed when not in use. Attached to both the light blocks and the shutter panels, they provide a reliable mechanism for maintaining privacy and security.
Required Tools for Installation
Before beginning the installation process, gather the necessary tools to ensure a smooth and efficient operation. You’ll require a step ladder, a metal tape measure, a cordless drill equipped with a Phillips head and a three-millimeter drill bit, a gap seal applicator gun, a spirit level, a pencil, and potentially a stud finder.
Surface Assessment and Preparation
Determining the Surface and Preparing for Drilling. Before proceeding with drilling, it’s essential to assess the surface you’ll be working on. If drilling into wood, you can proceed confidently. However, if the surface is plaster, you have two options to consider.
- Option 1: Utilize a stud finder to accurately locate the wall studs or battens.
- Option 2: Alternatively, consider using Ramset 10-millimeter hollow wall anchors. These anchors provide secure attachment points for your shutters, ensuring stability when affixed to plaster.
Exploring Other Surface Options. Should your installation require drilling into concrete, stone, brick, or tile, rest assured it can be accomplished with the appropriate tools. Employ a masonry drill along with suitable plugs, anchors, and screws for these surfaces. Once you have clarified your approach and selected the appropriate tools, you’re ready to proceed with confidence.
DIY Plantation shutters installation
Begin by clicking each section of your plantation shutter frame together using the Hoffman keys provided.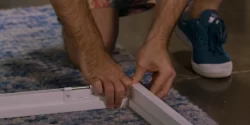
If you possess T-posts, securely affix them to your plantation shutter by screwing them onto the pre-drilled holes located on the sides of the frames. 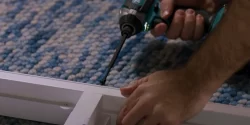
Next, proceed with precision drilling. Drill through the side of the frame behind each hinge for optimal stability. Additionally, drill two holes 500 mm apart through the back of the frame at both the top and bottom for added reinforcement.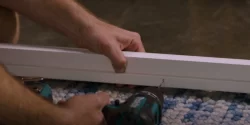
To achieve a seamless installation akin to a well-fitted wetsuit, ensure the front of the shutter frame aligns flush with the face of your wall. Maintain an even gap between the shutter frame and the window frame on all four sides for aesthetic appeal and functionality. While installing, it is needed to rotate the shutter frame within the window recess for a level position. This will help for smooth opening and closing of the panels. To commence, equip yourself with your drill and the accompanying screws. Begin by partially drilling the screws halfway into position.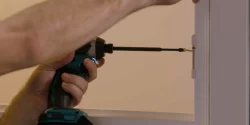
This allows for adjustment to ensure the frame is level across the top, a crucial step verified using a spirit level.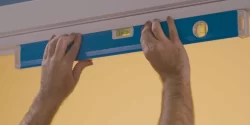
Subsequently, proceed to tighten the top screws first, followed by the side and bottom screws. For configurations incorporating a three-sided frame with T-posts, proceed by attaching brackets to the bottom of the T-posts. Subsequently, securely fasten the brackets into the recess.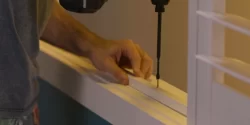
With the frame now properly aligned, shift your focus to attaching the panels. Position the left panel, ensuring the hinge aligns with the left side of both the frame and panel. To secure the panel in place, insert the hinge pin through the top. Repeat this process for each subsequent panel.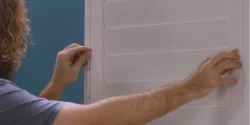
Upon completion, assess the functionality of your panels to ensure they open and close smoothly. If adjustments are necessary, tighten or loosen screws as needed to maintain frame alignment. This meticulous approach guarantees a seamlessly installed and properly functioning plantation shutter system. Verify that there exists a slender, uniform gap between each side of your plantation shutters frame and its respective panels. Having put in the effort, now is the time to navigate the final stretch smoothly. Let’s delve into the specifics of those cleverly designed three-sided frames.
For these configurations, it is imperative to position the light block within the recess, snugly nestled behind the shutter panels. Prior to securing the light block, confirm that the shutter panels can be effortlessly opened and closed without obstruction. Proceed by drilling two or three screws into the light block within the recess. 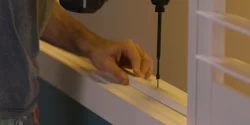
Utilize the provided screws to affix the magnet catches onto the front surface of the light block, ensuring proper alignment with the magnets located on the rear of the shutter panels.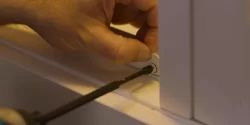
Sealing and Final Touches
Retrieve the gap seal tube and insert it into your n. This step is crucial for preventing light infiltration around the sides of your shutter frame. Positioning the gun at a 45-degree angle, carefully move it along each side, ensuring thorough coverage. Any excess sealant can be swiftly removed using a damp cloth or your finger. Allow the sealant to dry completely.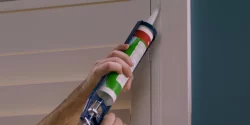
In the event of a wide gap, it may be necessary to repeat the sealing process for optimal light control. Upon completing the sealing process, it’s essential to dispose of the seal tube responsibly to safeguard our environment, including our oceans and marine life. To add the finishing touch, affix the provided stickers onto each visible screw, ensuring a polished appearance.
With these steps completed, your exquisite plantation shutters are now successfully installed, ready to enhance both the aesthetic and functionality of your space.

